I said jibbing not jiving! 😆
Cloud native architecture
When it comes to microservices and cloud native architecture you first think about containers. Now you can of course compose your own docker file. But with jvm based microservices there is a tool from google called jib that can simplify containerization.
We'll take a simple Spring Boot application and build its Docker image using Jib. And then we'll also publish to GCR and deploy on google cloud run.
Jib
Jib builds optimized Docker and OCI images for your Java applications without a Docker daemon - and without deep mastery of Docker best-practices. It is available as plugins for Maven and Gradle and as a Java library.
You don't even need docker installed. Just use maven or gradle plugin and away you go! It uses distroless base image under the hood, but as you expect all of this is configurable.
Jib supports multiple container registries, can change the base image, jvm flags, tags, volumes and much more.
Greeting App
I use VSCode heavily for development so I wanted to see what support they have for java and spring boot. In fact they have many extensions. The extensions I installed are:
- Gradle Extension Pack
- VS Code for java
- Spring boot tools
- Spring Initializr Java Support
- Spring Boot Dashboard
- Lombok Annotations Support for VS Code
- OpenAPI (Swagger)
- Settings Sync very important to sync if I change laptop in the future...
I used Spring Initializr to create a simple project in vs code.
It'll expose a simple GET endpoint:
http://localhost:8080/greeting
Deployment
Now I wanted to deploy this on cloud run and not worry about defining a docker file. So I used the gradle jib plugin and configured the credentials helper to deploy to GCR (Google cloud registry)
Cloud run
You can think of cloud run as CAAS (container-as-a-service) or serverless containers. It allows you to run your stateless HTTP containers without worrying about provisioning machines, clusters or autoscaling. The main difference with app engine flexible is that it can scale to zero - only pay per request.
If you are interested to learn more about cloud run check out the unofficial faqs
There is even a cloud run button if you want to deploy your API publicly.
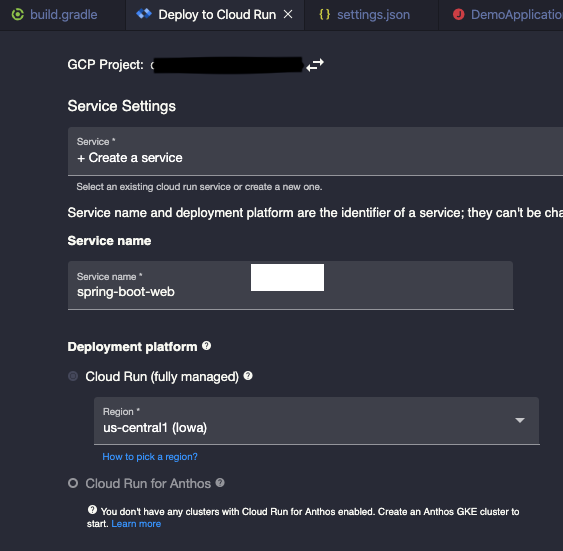
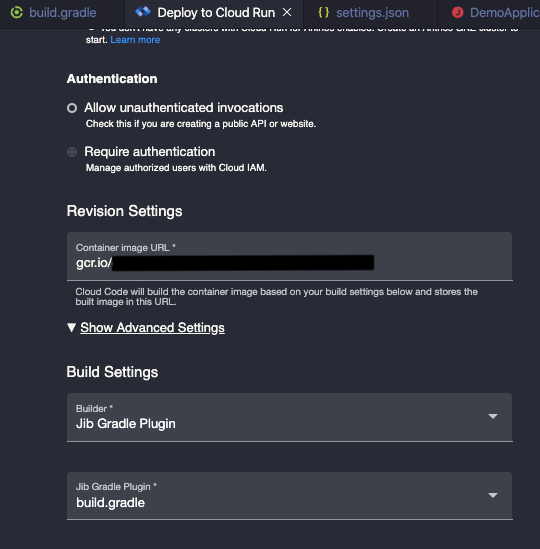
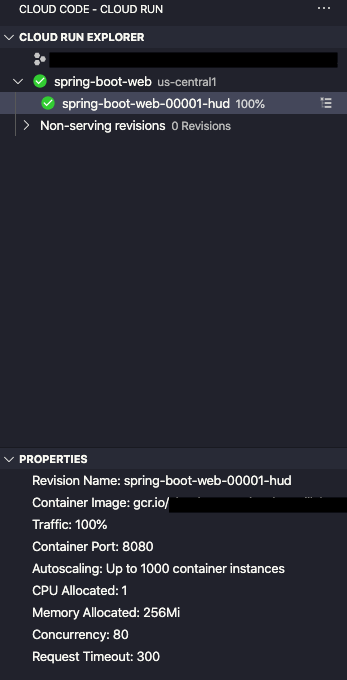
There is a fantastic VSCode extension called cloud code that can help you deploy to cloud run or GKE on google cloud. It can even pick up if you are using skaffold or jib under the hood.


This command will build, push your image to GCR and deploy to cloud run. And that's it!
Now you can access the public url and test out the endpoint.

The source code for the example is over on github
API design
In my previous post I discussed graphQL. Graphql provides a schema for introspection and type safety.
Now for REST, swagger or open API spec is the standard for designing and documenting your API. Even kubernetes API supports open api spec. Every time you call kubectl describe <resource> it calls this endpoint for info.
Tools such as insomnia designer and api gateways now support open api spec.
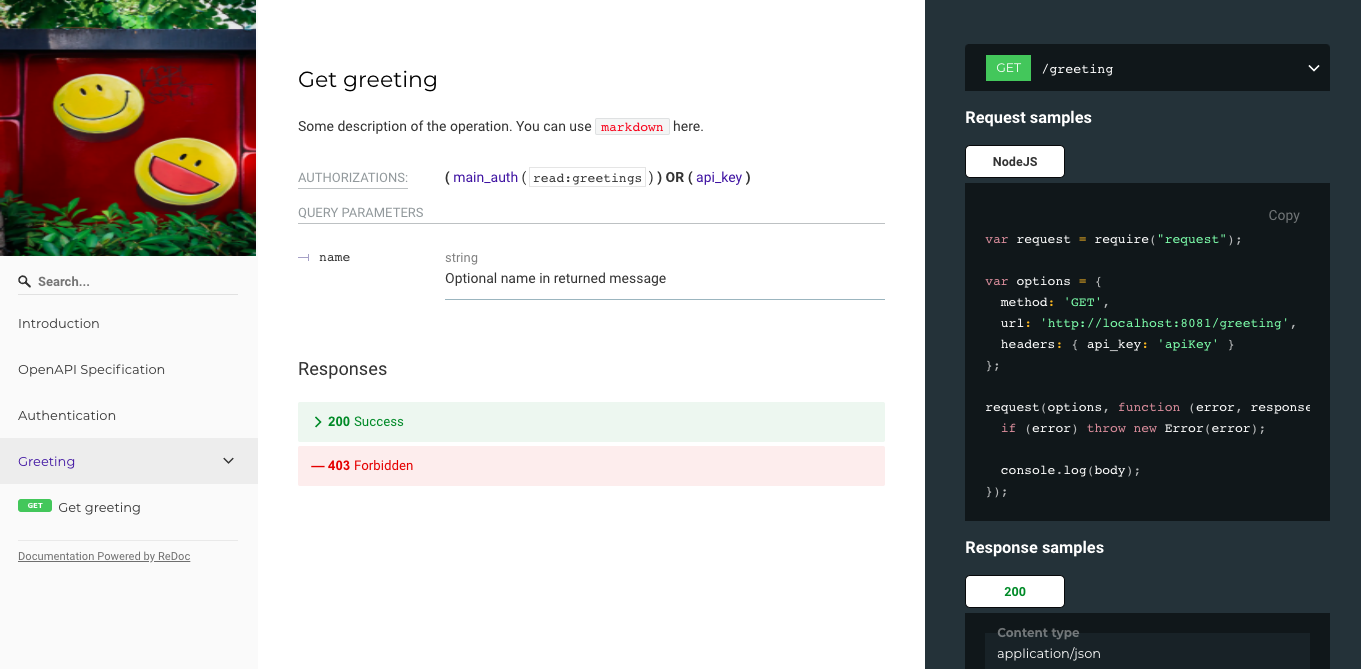
I decided to design and document my greetings API using redoc
Redoc
OpenAPI/Swagger-generated API Reference Documentation
Redoc supports open api spec v3 and provides responsive documentation with code samples. There is many ways to deploy but again Ill go the docker way and deploy on cloud run.
Redoc generator
Redoc has a generator which provides a docs-like-code approach to OpenAPI definitions. It allows you to validate your spec before bundling it. I documented my greetings API above, bundled it and served it as static content from the API itself
One thing to note is you need to enable CORS in your API to serve the static file. I also had an issue with @EnableMVC annotation so I removed that.
To deploy, I built redoc on GCR and deployed to cloud run. You can run this in cloud shell if you like
export PROJECT_ID=$(gcloud config list --format 'value(core.project)')
#change CLOUD_RUN_SPRING_BOOT_BASE_URI to the location of your API deployed on cloud run

gcloud run deploy redoc-greetings-api --project $PROJECT_ID --image gcr.io/$PROJECT_ID/redoc --platform managed --region us-central1 --port 80 --cpu 1 --memory 256Mi --concurrency 80 --timeout 300 --update-env-vars SPEC_URL=https://<CLOUD_RUN_SPRING_BOOT_BASE_URI>/swagger.yaml

Again, the src code can be found on github
And thats it. Happy jibbing! 🕺🏻